The Warthog Project
The Warthog Project
  • Home
  • Main Menu
  • Site Navigation
    • How it Began
    • The Tools
    • The Cockpit Structure
    • Panels and Electronics
    • Projectors and Screen
    • Software
    • Everything Else
  • Gallery
  • Video
  • FAQ
  • Downloads
  • More
    • Home
    • Main Menu
    • Site Navigation
      • How it Began
      • The Tools
      • The Cockpit Structure
      • Panels and Electronics
      • Projectors and Screen
      • Software
      • Everything Else
    • Gallery
    • Video
    • FAQ
    • Downloads
  • Home
  • Main Menu
  • Site Navigation
    • How it Began
    • The Tools
    • The Cockpit Structure
    • Panels and Electronics
    • Projectors and Screen
    • Software
    • Everything Else
  • Gallery
  • Video
  • FAQ
  • Downloads

the Panel Design

Why design my own?

My original 'Obutto Console Project' used the available panels shared on the ED Forums by user reactorone. I had begun editing his designs for that project, moving some switches and buttons around in the panels to fit cheap ebay toggles and rotary encoders, and to move them away from the edges so the buttons didn't foul on the support structure.


I later purchased my own laser cutter and started making my own panels, so I decided to stop using the reactorone files and decided to design my own from scratch. 

I did this for a few reasons, but the main ones were:

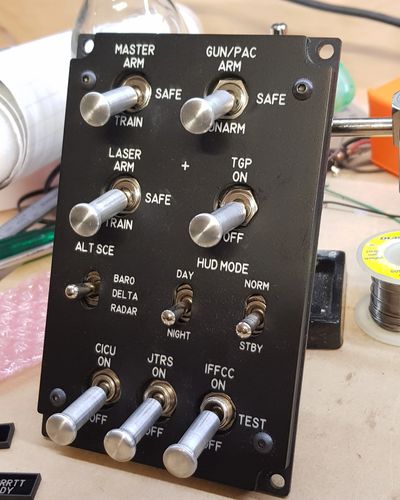
  • I wanted to use the correct font. The real jet uses a Military Standard font called MS33558. The reactorone panels used a similar but not completly accurate font. they were also shared in PDF format so the text was unable to be easily edited. That means I was going to have to retype all the text on every single panel anyway!
  • I needed the panels to be the correct DZUS standard size. Reactorone's panels were a close estimation, but the spacing was off. I had sourced some real panels that I wanted to fit in my cockpit, so I wanted my reproduction panels to match them perfectly.


So if I was going to need to resize the external dimensions, move all the mounting holes, and rewrite all the text anyway, It was actually easier for me to start from scratch.

The basic layout

All of the panels consist of three layers of laser cut cast acrylic sheet.


Bottom layer:

  • Cut from 3mm cast black acrylic.
  • Has holes cut, usually 12mm diameter, for mounting the switches.
  • Has 3mm holes cut for mounting the LED's for backlighting the text. More info on that here.
  • Has 5mm holes cut for mounting the panel to the cockpit structure


Middle layer

  • Cut from 3mm translucent white cast acrylic.
  • Has larger holes, usually 17mm, cut where the switches are, so it fits around the larger nut holding the switch in place. 
  • This layer has holes partially drilled/engraved in them where the LEDS sit, so the panel can sit flush against the bottom layer.


Top layer

  • Cut from 2mm solid white cast acrylic.
  • Has holes cut in where the toggles are, usually 12mm but sometimes different shapes. This means the nuts holding the switch in place is not visible as they are under the top layer.
  • This panel is cut out, then painted completely in flat black paint, before the text is then engraved into it. The laser removes the paint and reveales the white plastic underneath. As the paint blocks the backlight, only the text will illuminate.
  • The panel is cut, removed from the laser and painted, then put back in and engraved. This is done because if it were painted first, then cut and engraved in one go, the outside edges where they were cut out would also have the paint removed and would backlit.


The Bottom layer of the Electrical Power Panel. The green marked holes are for mounting the 3mm LEDs for the backlighting. The large 12mm holes are for switches, the three 4mm holes are for bolts that hold the panel together, and the four outer 5mm holes are for mounting it to the cockpit.

The middle layer of the Electrical Power Panel. The red marked holes are to be partially engraved to allow the LED's to sit inside. I engraved these in the laser, but ended up just hand drilling them on all future panels. Note the switch holes are now larger, 17mm, to fit the around the nut that holds the switch on the bottom layer. The rectangle is for the switch gaurd to slot into.

Top layer of the Electrical Power Panel. You can see the holes for the switches are now smaller, designed to cover the nuts and switch and allow only the toggle through. The three 4mm holes go through all the panels, and bolts go through to hold it all together like a sandwich. The small rectangle is the switch guard.

Here is the lower layer, with the top layer imposed over the top. You can see how the green marked holes for the LEDs align with the text. The LEDs along the side are offset to the ELEC PWR text, to minimise hotspotting and to allow for them to not be hard up against the wood structure of the cockpit. You can also see how I designed the top layer to be slightly smaller than the bottom, like the re

Show More

If you download my panels you will see I have included a PDF fle that has this complete coloured version, so you can print and use as a template if you wnat, similar to what I did in the origial project here.

Photo Gallery

All parts of the Electrical Power Panel cut

In place with no buttons installled/ You can see how the three (only two in it at the moment) bolts hold the panel together.

Switches installed. You can see how the nuts are hidden, showing only the toggles.

Backlight on and switches installed.

other hints and tips

Things i wish i knew before I started:

  1. Use quality spraypaint. Dont buy the $1 cheap export cans. I use Rust-oleum Matt Black, which is around $20 AUD a can. It is easy to use, dries quickly and evenly, it doesn't require a primer to stick to the acrylic, and it will likely last the lifetime of my cockpit. I have never had to re paint a panel because of scratching or chipping so far. It also lasers well, with no issues caused by the temperature change. I hav lasered engraved the cheap stuff, and it resulted in flames and melting and all sorts of strange things.
  2. Scuff the surface with sandpaper before painting. Using a shiny gloss acrylic plastic, and no primer, the paint needs something to grab too. I use a 600 grit sandpaper on the surface before paint, which will scuff the surface and flatten out the edges of where the laser has cut. Cutting with the laser is essentially burning plastic away, so the edges will melt and you will end up with a raised edge around your cut. Sandpaper it flat first.
  3. Once you have finished your last coat of paint on the top surface- add another coat. Nothing worse that getting a panel together, turning on the backlight and being able to see through the top layer.
  4. Round UP your measurements to the nearest millimeter. I'd rather have a slightly larger hole than the switch requires, than have a hole that is to small to fit the switch into. That goes against what i would normally recommend- because in theory its always easier to remove material than add it once its gone. However- with cast sheet acrylic- drilling an already large hole out to be slightly larger will result in chips and maybe even broken panels once the drill bit bites. I've tried enlarging holes slowly, on a drill press with a sharp drill, and even tried stepping drill bits and dremel sanding bits, but it always results in chipping or melted/burned plastic and a ruined finish.


This video explains the basic design and how I manufacture the panels. 

RETURN TO MENU

Copyright © 2023 The Warthog Project - All Rights Reserved.

Powered by Coffee, Hate, and 30mm APDS-T.